The Step-by-Step Guide to DIY Fix iPhone 13 Pro Microphone Not Working
Imagine grabbing your iPhone 13 Pro, ready for an important call or to record a creative idea, and suddenly, the microphone fails. Panic sets in, right? DIY fix iPhone 13 Pro microphone not working could be your hero in these moments. You might not know this, but often it’s something you can tackle on your own. No need for expensive repairs or waiting days for an appointment.
Understanding the root of iPhone 13 Pro microphone issues can save you time and stress. From adjusting iPhone microphone settings to figuring out if it’s a software glitch, identifying the problem is key. Sometimes, simply cleaning your mic or performing an iPhone microphone test can make all the difference. Don’t let mic troubles feel like the end of the world. Instead, see them as a puzzle you can solve.
Ready to dive into fixing iPhone microphone problems like a pro? Discover how easy and empowering troubleshooting iPhone 13 audio can be. Unlock the secrets to DIY iPhone repair and take control of your device’s sound issues today!
Within the story
Understanding iPhone 13 Pro Microphone Issues
You’re probably wondering why your iPhone 13 Pro microphone isn’t working properly. iPhone 13 Pro microphone issues are more common than you might think. There are several reasons why this might be happening. Understanding these can help you fix the problem.
Identifying Microphone Issues
How do you know if your microphone isn’t working? You might notice that during phone calls, people can’t hear you clearly. Sometimes, when you use voice commands, the responses might be incorrect. These are signs that you should look into your microphone.
If your microphone isn’t working, your phone’s performance can be affected. You’re likely to notice issues with voice recordings. Apps that rely on your microphone might not work as they should. This can be frustrating, but don’t worry. There’s a way to fix this problem.
When your microphone isn’t working, your call quality suffers. You might sound far away or muffled. This can lead to confusion during conversations. Call quality is important, so solving this is a priority.
Why Microphone Issues Occur
Software glitches can make your microphone act up. Sometimes, apps interfere with each other. This can cause microphone problems. It’s a common issue and usually easy to fix.
Hardware malfunctions are another cause. Accidental drops can damage the microphone. Water exposure can cause issues too. If your phone has suffered physical damage, it might be time to look closer.
Changes in your settings might also affect your microphone. Sometimes, you might tweak settings without realizing their impact. Knowing how settings can influence your microphone is key to repairing it.
Did you know your environment can cause microphone issues? Dust or debris might block it. This affects the sound quality. So, keeping your phone clean can help prevent further issues.
DIY Fix iPhone 13 Pro Microphone Not Working
If you’re dealing with sound issues, there are steps you can follow to fix them yourself. Let’s look at how you can troubleshoot iPhone 13 audio problems in simple steps.
- Restart your iPhone.
- Check microphone settings.
- Update iOS software.
Restarting your device can often fix minor software issues. It’s a quick and easy first step. Next, check your settings. Ensure the microphone is enabled for apps that need it. Updating your iOS software can also solve bugs that might be affecting your microphone.
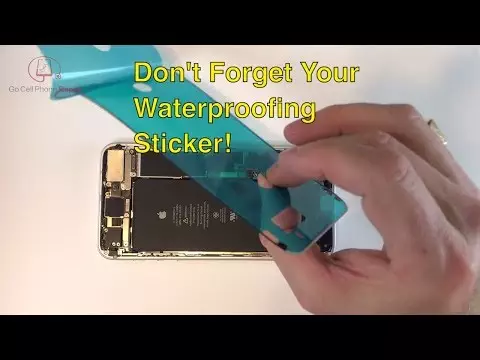
Visually inspect the microphone openings. You might find lint or dirt. Use a soft brush to clean them gently. This might improve sound quality.
Resetting iPhone Microphone Settings
Resetting your microphone settings can often resolve problems. This might sound technical, but it’s not too hard. Here’s how you can fixing iPhone microphone problems by resetting.
Accessing Microphone Settings
First, locate your microphone settings. Go to your iPhone’s settings menu. From there, tap on the “Privacy” option, then “Microphone”. Here you can manage app permissions.
Keeping settings at their default can prevent issues. It’s smart to know which apps can access your microphone. Sometimes, resetting might be the best choice.
To reset, go to “Settings”, then “General”. Tap on “Reset”, and choose “Reset All Settings”. This won’t erase your data but will restore your settings.
After Resetting Steps
After resetting, it’s important to test your microphone. Make sure everything works as it should. You need to confirm that resetting solved your issue. If your microphone seems to be working, you’re on the right track.
Testing Your Microphone’s Functionality
Performing an iPhone Microphone Test
To ensure that your microphone works, you should perform a test. Here’s a step-by-step guide: Go to the “Voice Memos” app on your phone. Record a short memo and play it back. Listen to hear if it’s clear.
This simple test will tell you if your microphone works. If you hear your voice clearly, your mic is fine. If the sound is garbled, you might need to try other fixes.
Using Voice Memos for Testing
Voice Memos is a great tool for testing. Record a short message and analyze it. Check for any distortions or issues. If the recording sounds clear, then your microphone is in good shape.
If you notice problems, you might need further tests. iPhone microphone test using different apps can also help isolate the issue.
Exploring iPhone 13 Pro Sound Issues
Impact of Sound Settings
Sound settings can greatly impact your experience. When not set correctly, they might hinder audio performance. Pay close attention to these settings.
Your audio settings can affect microphone performance. Check if any changes have been made. Having optimized sound settings improves your overall sound experience.
Resetting Sound Settings
If you’ve tinkered too much, it’s time to restore default settings. Go to “Settings”, then “Sounds & Haptics”. Set everything back to default. This can fix various sound issues.
Restoring defaults can be soothing. You’ll notice an improvement in audio performance. IPhone 13 Pro Sound Issues might just fade away.
Steps for Further Troubleshooting
Advanced iPhone Audio Troubleshooting
If previous steps didn’t work, try advanced troubleshooting. Open different apps that use microphones to see if issues persist. Testing with various apps can pinpoint if the issue is app-specific.
Also, check for iOS updates. An update might solve any existing bugs. Ensuring your phone runs the latest software can help with mic troubleshooting iPhone issues.
When to Consider Professional Repair
Sometimes, DIY might not be enough. If your microphone still doesn’t work, consider professional repair. They have the tools to diagnose hardware problems.
Signs that you might need expert assistance include persistent issues after all attempts. They can conduct a detailed examination, ensuring your phone functions well.
Preventing Future Microphone Problems
Prevention is key to maintaining a healthy microphone. Here are some tips on DIY iPhone repair you can do to keep your iPhone in top condition.
Regular Software Updates
Always ensure your iPhone is updated. Software updates fix bugs and improve performance. Go to “Settings”, then “General”, and select “Software Update”. Set it to update automatically.
This simple step can prevent future microphone issues. It’s crucial to keep your technology up to date.
Protecting Your iPhone
Using cases can protect your phone from physical damage. Choose ones that add protection without hindering performance. They safeguard your device from accidental falls.
Regular cleaning prevents dust buildup. A soft cloth can wipe away debris. This ensures your microphone isn’t blocked, promoting better sound quality.
Mindful Usage Tips
Use your iPhone responsibly. Avoid exposure to water and extreme conditions. Being mindful of how you handle your device is also important for longevity.
Monitoring Audio Settings
Regularly check your audio settings. Make it a habit to ensure they remain optimal. Adjust them as necessary to maintain sound quality.
Frequent checks ensure everything runs smoothly. Keeping an eye on settings can prevent random microphone issues.
Using Compatible Accessories
Ensure your accessories are compatible with your iPhone. Mismatched accessories can cause unexpected issues. Research before purchasing something new.
Choosing the right accessories enhances your experience. You need to know what works best with your device for optimal performance.
Wrap Up Your iPhone Adventure
Tackling iPhone sound issues may seem daunting at first, but you have the power to resolve these challenges. By addressing microphone problems directly, you improve your phone’s performance and ensure that your calls and recordings are crystal clear. Remember, mastering these solutions boosts your confidence in handling similar tasks in the future. Plus, you save time and money by skipping unnecessary trips to the repair shop.
Now that you’re familiar with the solutions, take a moment to gather any necessary tools or materials. Start by checking your device’s settings and testing the microphone with a simple voice note. If needed, follow the guide to troubleshoot audio issues further or consider a mic repair if deeper problems persist. Staying organized will make the process smoother and more effective.
Take the first step today. Dive into those settings and perform a quick microphone test. You’ll be glad to see the improvements and enjoy the satisfaction of solving it yourself. If challenges arise, remember you’ve got the skills and know-how. Go ahead—your iPhone awaits your expert touch!