The Ultimate Guide to Your Step-by-Step DIY iPhone 12 Pro Max Charging Port Replacement
Are you tired of struggling with your iPhone 12 Pro Max charging issues? You’re not alone. Many people face this frustrating problem. And with DIY iPhone repairs becoming a hot trend, there’s never been a better time to tackle these repairs yourself. In this step-by-step DIY guide to replacing iPhone 12 Pro Max charging port, you’ll learn how to fix your charging woes quickly and efficiently, all from the comfort of your home.
Before diving in, you might wonder if this kind of iPhone 12 Pro Max repair is for you. The good news? With the right repair tools for iPhone and a bit of patience, anyone can do it! No more disassembly anxiety or relying solely on pricey repair shops. Plus, while you’re at it, sorting out any iPhone battery issues or choosing the right iPhone 12 Pro Max accessories will become a breeze.
If you’re eager to step up your iPhone hardware repair skills, dive in! Unlock the secrets to solving your iPhone charging issues and gain the confidence to handle any iPhone 12 Pro Max troubleshooting. Let’s get started and empower yourself with these essential repair skills.
Within the story
Understanding iPhone 12 Pro Max Charging Issues
Common Symptoms
Does your iPhone 12 Pro Max stop charging all of a sudden? This can be a common symptom of charging port issues. It’s frustrating, isn’t it? Another sign to look out for is when the cable connection feels loose. You might plug in the charger and notice it wobbles in the port. That’s not good. Lastly, if charging takes longer than usual, your phone’s charging port might be the culprit. This is especially true if you’ve checked your charging cable, and it works fine with another device.
Step-by-Step DIY Guide to Replacing iPhone 12 Pro Max Charging Port
So, you’re ready to tackle this project. Let’s do it step by step. First, you need to prepare for the DIY phone repair project by setting yourself up for success.
- Gather necessary tools. Having the right tools makes the job easier and safer.
- Ensure workspace is clear. A clean area helps you keep track of those tiny screws.
- Backup your data. Always a good idea before opening your device.
During the repair, it’s important to stay organized. Label small parts carefully. You don’t want to mix them up when putting everything back together. Now, let’s look at gathering repair tools for iPhone hardware repair.
Gathering Repair Tools for iPhone
To start your charging port replacement, you need a few essential tools. First, purchase a screwdriver set. This is critical because each screw on your iPhone requires a specific type. Next, you’ll need plastic opening tools. These will help you safely pry apart components without damaging them. Finally, have a clean, soft cloth ready. It’s useful for setting down parts and keeping everything scratch-free.
iPhone 12 Pro Max Disassembly
Let’s dive into the disassembly process. Begin by carefully removing parts, being gentle with everything you handle.
Removing the Screen
The first step in disassembly is to unscrew the bottom screws. These are located near the charging port. Then, using the suction cup, lift the screen gently. Take your time; you don’t want to crack the screen or damage cables underneath.
Accessing the Charging Port
Now, it’s time to access the charging port. Disconnect the battery first to prevent any short circuits. Then, locate the port assembly. You’ll find it at the bottom of the device. It’s essential to handle each piece with care to avoid causing more issues.
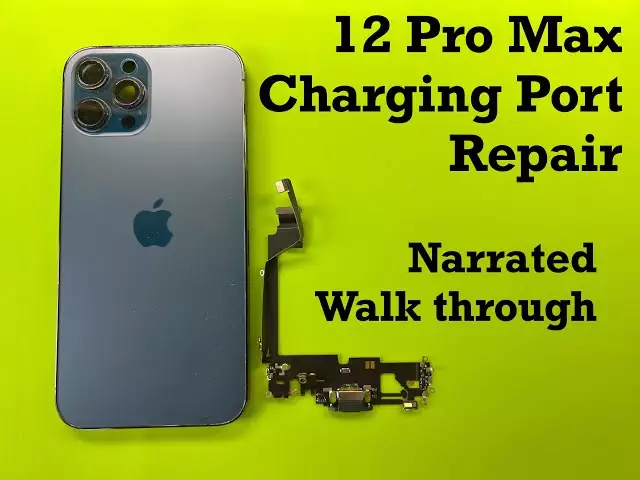
Replacing the Charging Port
With the charging port assembly exposed, unscrew the old port carefully. Then, install the new charging port in its place. Make sure everything is aligned properly. This ensures the port functions as it should once the phone is reassembled.
iPhone 12 Pro Max Troubleshooting
After replacing the port, you need to test the new charging port’s functionality thoroughly. It’s important to confirm that the repair was successful.
Checking Connection
To check if the new port works, reassemble the device first. Once it’s put back together, plug in the charger and observe its response. Does the device charge as expected? If yes, you’ve done a great job. If not, double-check connections and ensure everything is tightened.
Preventing Future iPhone Charging Issues
Now that you’ve fixed your iPhone 12 Pro Max, let’s talk about prevention. How can you stop this issue from happening again? Well, maintain charging port cleanliness. It’s one of the best ways to ensure long-lasting functionality.
Use Quality Accessories
Another preventive measure is using quality accessories. Invest in certified cables that are designed to work well with your device. Avoid cheap, unapproved chargers as they can cause damage over time. They’re tempting because they’re inexpensive but not worth the risk.
Final Notes on DIY iPhone Repair
You’ve gone through a lot, haven’t you? Take your time with your repair. Rushing might cause mistakes, and we definitely want to avoid that. Remember, learning from online tutorials can be very helpful.
Understanding iPhone Hardware Repair
Gaining a good understanding of iPhone 12 Pro Max disassembly is key. Many tutorials online can guide you step by step. Another tip is to practice with old devices first. This way, you’ll be more confident when working on your main device.
Exploring iPhone 12 Pro Max Accessories
Finally, consider exploring some new accessories. Choose protective cases to guard against physical damage. Consider screen protectors for added safety. These can help keep your device in great condition for longer.
Empower Your DIY Skills
By learning how to address charging issues with your iPhone, you gain valuable skills in tech repair. You’ll save both time and money by tackling this project yourself, boosting your confidence with each successful repair. Plus, understanding your phone’s inner workings makes future DIY projects less daunting.
Next, gather all necessary repair tools and review the steps once more before you start. Make sure your workspace is clean and organized to ensure everything goes smoothly. If at any time you feel uncertain, seek out a reputable tutorial video for visual guidance to reinforce your understanding.
Now, dive into your next DIY adventure with confidence. Take control of your repairs and enjoy the satisfaction of solving tech problems on your own. You’ve got this!