Stop Overlooking Complete DIY Repair Tutorial for Your iPhone 8 Plus
Have you ever found yourself with a cracked iPhone 8 Plus screen or a battery that drains too quickly? These common issues can be frustrating, but you don’t have to stress. With a complete DIY repair tutorial for iPhone 8 Plus, you can tackle these problems on your own. Imagine the satisfaction of fixing your device without spending a fortune at a repair shop. You’ll gain confidence and keep your wallet happy.
Whether you need an iPhone 8 Plus screen replacement, a battery repair, or even a home button fix, you can handle it. You will discover the best iPhone 8 Plus repair tools and learn step-by-step instructions to make the process smooth. Don’t let another day go by without diving into this iPhone 8 Plus repair guide. You’ll feel like a tech expert in no time.
Ready to give your iPhone 8 Plus the care it deserves? Explore the DIY iPhone 8 Plus fix and transform your repair skills while saving money. Dive in and start your journey to a perfectly functioning phone today!
Within the story
Complete DIY Repair Tutorial for iPhone 8 Plus
Understanding Your Device
Before diving into repairs, it’s crucial to know your iPhone 8 Plus parts. You have components like the screen, battery, home button, camera, and speaker. Each part has its unique function and you need to understand them first. Knowing how these parts work will help you pinpoint what’s wrong when your phone is not functioning correctly.
Identifying common repairs needed is the next step. Are you dealing with a cracked screen? Is the battery life not holding up? Can you hear sounds correctly? Recognizing these issues helps you decide which repair you need to focus on.
Essential Tools
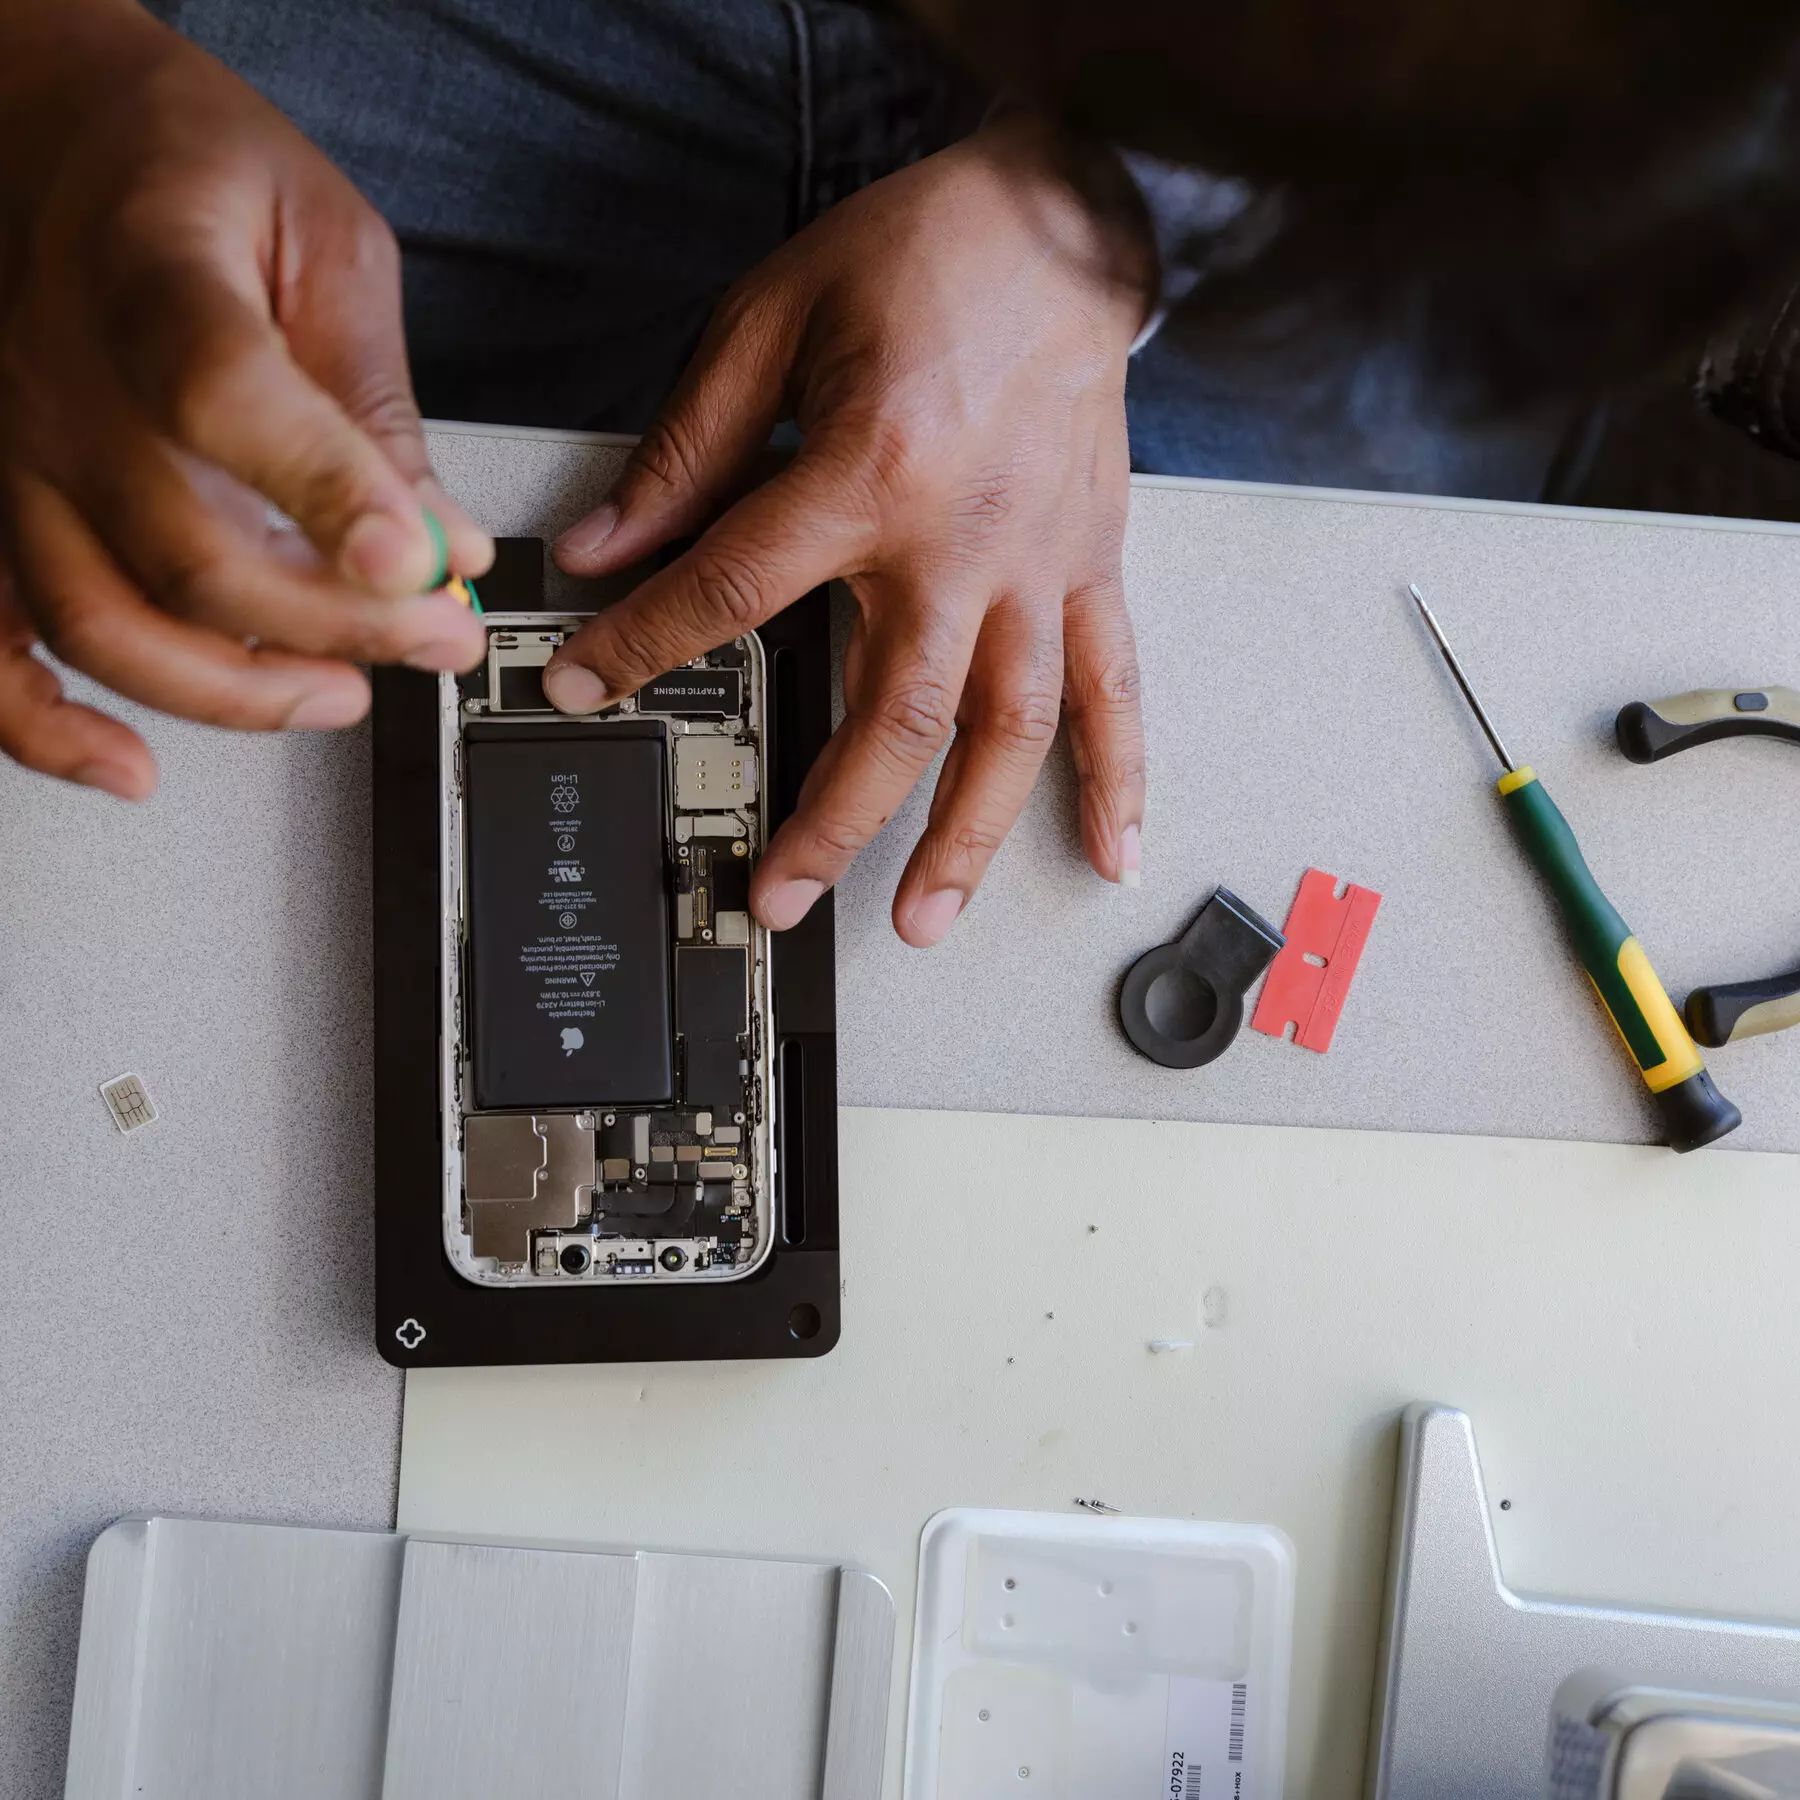
A successful repair starts with the right tools. You need to gather iPhone 8 Plus repair tools such as a screwdriver set, spudger, tweezers, and suction cup. These tools will help you take apart and put back your phone with ease.
Ensure quality tools for success by investing in good-quality tools. Cheap tools can damage your phone or make repairs harder. Your tools should fit properly in screws and not strip them.
iPhone 8 Plus Screen Replacement
Replacing the screen is a delicate job. You must handle it with care for safety. A cracked screen can lead to cuts or further damage to your phone. Handle it gently and follow safety tips to avoid injury.
Step-by-Step Instructions
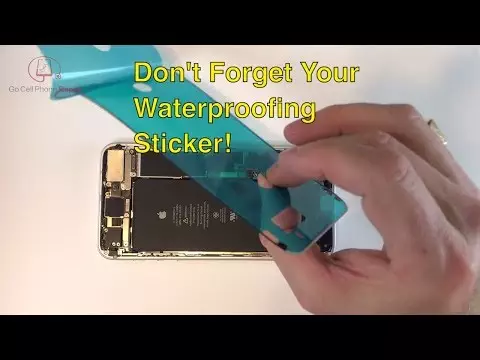
Here’s how to do an iPhone 8 Plus screen fix. First, turn off your phone and remove the screws near the charging port. Use a suction cup to lift the screen slightly from the housing. Insert a spudger to gently pry around the edges. Once the screen is loose, disconnect the cables carefully.
Check screen functionality post-repair to ensure everything is in place. Reconnect and test the touchscreen to ensure it’s responsive. Make sure there are no dead spots on the display.
Troubleshooting Screen Issues
If you face problems after replacing the screen, don’t worry. Resolve display problems easily by checking connections. Ensure cables are not loose. Sometimes, the problem might be with new parts that aren’t working properly.
iPhone 8 Plus Battery Repair Guide
Replacing the Battery
If your phone isn’t holding a charge, it might be time to replace the battery. Understand battery health indicators to know when a battery swap is needed. Look for signs like sudden shutdowns or rapid battery drain.
Tool Preparation
Prepare tools for battery swap by gathering the necessary items. You need a heat gun, spudger, and screwdriver set for this task.
Ensure safety precautions always. Remove any static electricity from your hands and workspace. Use a plastic spudger to disconnect the battery safely.
Testing Post Replacement
After inserting a new battery, turn on your phone. Check if your phone holds a charge by using it for regular tasks. This will ensure that the replacement was successful.
Battery Troubleshooting Tips
If you still encounter issues, like fast draining, consider recalibrating the battery. Use your phone until it fully drains and then recharge it 100% without interruption.
Fixing iPhone 8 Plus Home Button
Home Button Repair Techniques
Over time, home buttons can become sticky or unresponsive. Identify the issue carefully by observing the button’s response. Check if it’s a hardware problem or something in the settings.
Explore simple fixes first, like cleaning around the button. Use a tiny brush or blowing air to remove dust. Sometimes you might need to reset your settings to fix software glitches.
Preventing Future Issues
Maintain your home button’s life by keeping it clean and dry. Avoid pressing too hard on the button, and use software gestures when possible.
Regular checks can help avoid damage. Occasionally test the button’s functionality to catch issues early on.
iPhone 8 Plus Camera and Speaker Repair
Occasionally, your camera or speaker may not work right. Tackle camera and speaker faults by checking connections and cleaning these components.
Camera Repair Steps
If your pictures are blurry, there are a few steps you can take. Fix blurry images effectively by cleaning the lens with a microfiber cloth. Ensure lens cleanliness and care by removing dust and fingerprints regularly.
Speaker Repair Procedures
Sometimes sound issues can affect calls or music. Resolve sound issues easily by checking the speaker grille for dirt. You can also try playing audio to test the sound quality.
Test speaker after repairs by making a call or playing music. Notice if the volume is clear and without distortion.
iPhone 8 Plus Parts Replacement
Over time, you may need to replace parts like screens, batteries, or speakers. Parts replacement is crucial for longevity and keeping your phone in top shape.
Choosing Quality Parts
When you’re buying replacement parts, make sure to select reliable replacement parts. Quality parts last longer and fit better.
Check compatibility before purchase by verifying the model number. Not all parts fit every model, so double-check the specifications.
Verify parts with serial numbers to confirm authenticity. Fake parts often have inconsistent serial numbers or labels.
Inspect parts upon arrival. Look for any damage or discrepancies compared to original parts.
- Screen
- Battery
- Camera
- Speaker
Replace only as necessary. Don’t swap parts unless it’s needed, as every replacement carries a slight risk of introducing new problems.
DIY iPhone 8 Plus Fix
A DIY repair iPhone 8 Plus project can be rewarding if done right. Make sure every step is followed carefully and re-check every connection when done.
Ensuring Proper Functionality
After repairs, test your phone thoroughly. Use all functions like calls, camera, and apps to ensure everything works as intended. This final check confirms a successful fix.
Mastering iPhone 8 Plus Troubleshooting
Tackling issues as they arise boosts your confidence and extends your phone’s life.
Common Issue Solutions
Apply fixes for frequent problems by looking up issues online or in guides. There’s usually a solution for every common problem.
Identify issues quickly by paying attention to how your phone behaves. Slow performance or frequent crashes might signal a deeper issue.
Explore solutions thoroughly. If one method doesn’t work, try another. Persistence often leads to finding a suitable fix.
Take Control of Your iPhone Repairs
By following straightforward steps, you can easily tackle common issues with your iPhone 8 Plus. Save time and money using simple tools while gaining the confidence to handle problems yourself. Whether it’s the screen, battery, or any other part, you have the power to fix it.
Start by gathering the necessary tools and setting aside some quiet time. Then, choose one repair project, like a battery fix or screen replacement. Follow a reliable guide closely, taking careful steps to avoid errors. Practice makes perfect, so don’t hesitate to try.
Feel empowered to dive into your first repair. Begin today and experience the satisfaction of mastering your iPhone 8 Plus maintenance. You’ll soon see how capable you really are. Give it a go!