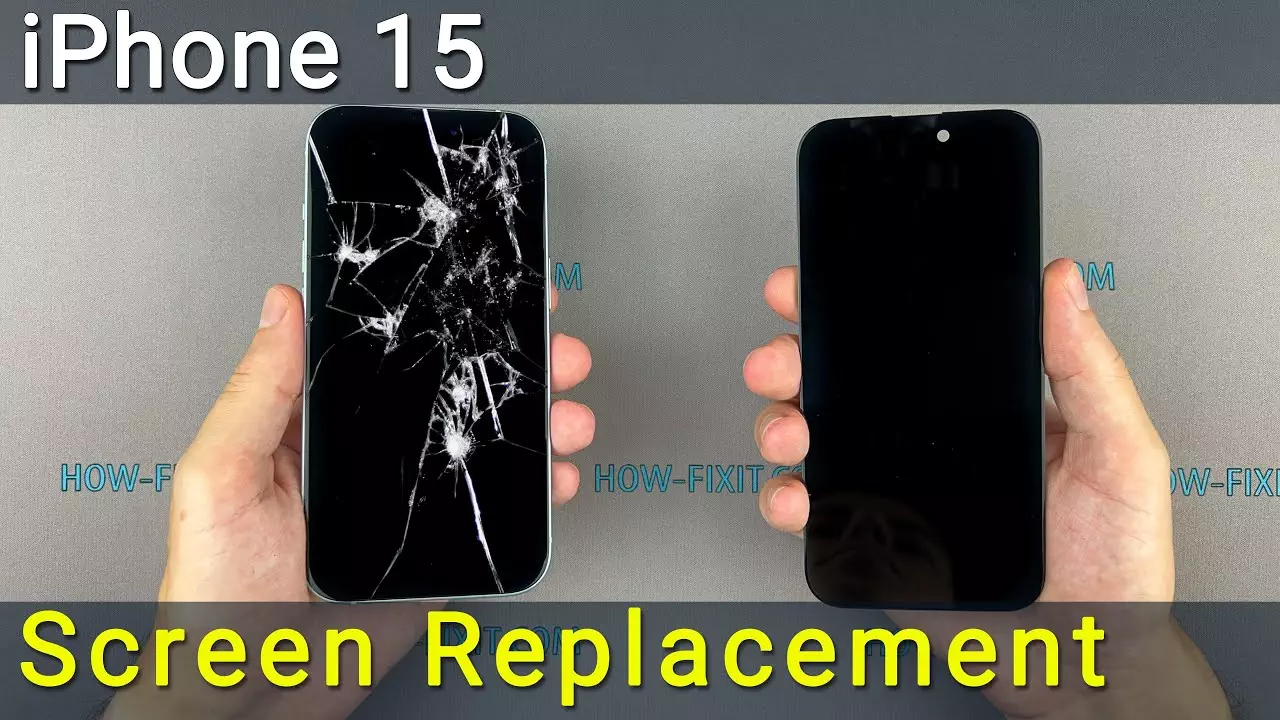
Quick Fix for Broken iPhone 15 Screen DIY: How to Achieve a Flawless Repair
Have you ever felt that sinking feeling when your brand-new iPhone 15 slips from your grasp and hits the floor? You glance down and see it-the dreaded shattered screen. It’s a nightmare many face, but is there a quick fix for a broken iPhone 15 screen DIY style that actually works? Luckily, you can tackle this issue on your own without breaking the bank. Here, we’ll explore the simple steps you can take to turn your iPhone 15 screen repair into a successful DIY project.
Imagine having the power to repair your iPhone 15 at home, sparing yourself the time and cost of visiting a professional. By understanding how to fix a cracked iPhone screen using a few essential tools, you not only save money but also gain a handy skill. Whether your goal is to perform a complete iPhone 15 screen replacement or just to handle minor cracks, you’ll find effective broken iPhone screen solutions that can make your phone look as good as new.
Ready to dive into the world of DIY iPhone screen repair? Let’s explore the steps to achieve the flawless iPhone 15 display fix you’ve been dreaming about. Your perfect repair is just a few clicks away! Keep reading to unlock the secrets of mastering the self-repair iPhone screen method.
Within the story
Prepare for Quick Fix for Broken iPhone 15 Screen DIY
Starting your journey to repair your iPhone 15 screen on your own can feel daunting, but don’t worry. You just need the right tools and a bit of guidance. Let’s gather everything you’ll need.
Essential Tools
The first tool you’ll need is a screwdriver. It’s vital for removing the small screws that hold your iPhone together. Next, a prying tool is necessary. It will help you gently lift the screen without causing damage. Make sure to get a high-quality one.
Also, have a magnifying glass ready. This will allow you to see the tiny components inside your phone clearly. It’s easy to miss a small connection if you can’t see it properly, so this tool is a must.
Screen Replacement Guide
Having a screen replacement guide can be incredibly helpful. This guide will take you step by step through the process, making it easier to understand what to do next. Look for guides with clear pictures or videos.
DIY iPhone Screen Repair Safety Tips
Safety first! Make sure you work in a well-lit and clean environment. Wear an antistatic wrist strap to prevent static electricity from damaging your phone’s electronics. This small step can prevent big problems.
Understanding Your iPhone 15 Screen Repair
Before diving into the actual repair, it’s crucial to understand the structure of the iPhone 15 screen. Knowing what you’re working with can make the process smoother and more effective.
Screen Components
An iPhone screen has several important parts. First, there’s the LCD, which displays the images, and the digitizer, which senses your touch. Together, these create the interactive screen you know and use daily.
Next, there are the protective glass layers. These provide the necessary protection against the daily wear and tear your phone goes through. It’s essential to know how these layers fit together.
Also, take note of the adhesive placement. The adhesive holds the screen securely in place. Understanding where it is will help you during both the removal and installation of the screen.
Lastly, be aware of the screen connectors. They are the tiny pieces that connect your screen to the phone’s motherboard. Handle them with care, as they are delicate but essential for the screen’s functionality.
Common Screen Issues
Before you start, identify the specific issues with your screen. Is it cracked? You might also notice dead pixels or areas that don’t display correctly. These are usually lighter or darker spots that don’t change.
Another common issue is unresponsive touch areas. This means parts of the screen don’t respond to taps or swipes. Identifying these problems will help you know what to focus on during the repair.
When to Seek Professional Help
While DIY repairs can be satisfying, it’s important to recognize when you’re in over your head. If the damage is extensive or you notice any components are missing, it might be best to consult a professional. Knowing your limits can save your phone from further damage.
Steps to Fix Cracked iPhone Screen
Now, let’s go through the steps to fix a cracked iPhone screen. Follow these carefully to achieve the best results.
- Turn off your device. This is crucial to prevent any electric shock or further damage during the repair.
- Remove the damaged screen. Use your screwdriver and prying tools to carefully detach the screen components.
- Install the new screen carefully. Make sure all components align properly before securing them.
After installing the new screen, ensure all connectors are secure. Loose connections can cause your screen to malfunction. Double-check everything before moving on to the next step.
Once everything is in place, test its functionality. Turn your device back on and check if the screen lights up. Touch different areas to see if they respond as they should.
Detailed Clean-Up
Before closing up your phone, ensure there’s no dust or debris. Use a soft, lint-free cloth to clean the screen. A clean screen helps improve touch response and clarity.
Reattaching Components
It’s time to ensure connectors attach firmly. Make sure each piece clicks into place without forcing it. Double-check that all components fit securely. This step ensures the screen stays functional and doesn’t pop out later.
Final Screen Testing
Turn on your phone and test its touch responsiveness. Is every part of the screen working as it should? A quick test now can save you from future frustrations.
Also, visually inspect the display quality. Look for any color distortions or lines that shouldn’t be there. Good quality means your repair was successful.
Choosing the Right iPhone Screen Repair Kit
Finding the right repair kit is essential to the success of your DIY project. Let’s explore what to look for in a quality kit.
Kit Components
A good repair kit should include all the necessary tools. These often consist of screwdrivers, prying tools, and a suction cup for screen removal. Having the right tools makes the job much easier.
Also, verify the quality of the screen parts included. High-quality screen parts ensure a durable repair, so don’t skimp on quality.
Before buying, read user reviews. These reviews provide insight into the reliability of the kit. Positive feedback is usually a good sign that the kit is worth purchasing.
Cost and Quality Balance
While it may be tempting to go for the cheapest option, ensure you balance cost and quality. A slightly more expensive kit might save you money in the long run by avoiding additional repairs.
Self-Repair iPhone Screen Tips
Here are some tips to ensure your DIY repair goes smoothly. Keep these in mind as you work on your phone.
Patience and Precision
First, work slowly and avoid rushing. Being patient can prevent mistakes. Focus on each small detail. This attention to detail can mean the difference between a successful repair and disaster.
Stay calm during complex steps. Sometimes, things won’t go according to plan, and that’s okay. Taking a deep breath can help you refocus and prevent errors.
Avoid Common Mistakes
Be cautious not to over-tighten screws or use too much force. These mistakes can damage your phone permanently. If something doesn’t fit, reexamine the components to see what went wrong.
Testing and Final Touches
You’re almost done! Now it’s time to check and ensure everything is perfect before you consider your project complete.
Post-Repair Testing
Test all phone features carefully. Check the camera, microphone, and speakers to ensure they function correctly. Sometimes, repairing the screen can affect other components.
Ensuring Satisfaction
Finally, confirm that no issues remain. If you find something wrong, address it now. It’s much easier to fix problems while everything is open. A thorough check ensures a successfully repaired phone.
Long-term Care and Maintenance
Now that your iPhone 15 screen is fixed, it’s essential to keep it in good condition. Here’s how you can do that easily.
Screen Protection
Apply a screen protector immediately. A new protector offers a layer of defense against future scratches and cracks. It’s a small investment that saves money down the line.
Regular Maintenance
Clean your screen regularly and avoid exposing your phone to harsh conditions. Wiping it with a soft cloth removes fingerprints and keeps it looking new. Avoid leaving your phone in extremely hot or cold places as well.
By following these steps and tips, your newly repaired iPhone 15 screen should stay in great shape for a long time!
Conclusion: Empower Your iPhone Screen Repair
Repairing your iPhone 15 screen yourself offers many benefits. You can save money and time by not waiting for costly professional services. Plus, you’ll gain the satisfaction of fixing it yourself. You can handle this task with the right tools and guidance. It’s empowering to take control of your device’s upkeep.
Start by gathering the necessary tools and a reliable repair guide for your specific iPhone model. Purchase a quality screen repair kit to ensure you have everything required. Next, set aside enough time to work without rushing. Follow each step closely, and don’t hesitate to pause and review instructions. Take your time for the best results.
Now is the moment to take action. Begin your repair today and restore your phone’s display to its former glory. Trust in your ability to tackle this project successfully. Your iPhone 15 will soon look as good as new. Go for it and enjoy the satisfaction of a job well done!